Friday, October 29, 2010

Hosting Your Own Spooktacular Halloween Party

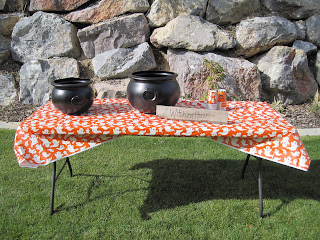
 Every year, I host a little party for my kids and their friends.  Halloween with toddlers is a ball.  I am the token witch.  We start off with "witches brew", rootbeer and dry ice. 

 The pinata is always the last activity and the most fun.  If you've never done a pinata, go to Partyland and get one.  Porter had to have Dracula.  Thankfully, they had one.

 Walmart and Target have great cheap decorations for all of your needs.

 Black plastic sheeting from Lowes, rope, a ladder, and black garbage bags made the perfect tunnel for our little spooks to come through to enter the party.

 I found a bunch of old barn wood to make the signs.

 The spider balance beam was a great addition this year.  I bought cement blocks from Lowes (1.39 ea) and a 2x6x8.  I found great spiders at TaiPan for around $3 and used a bunch of black spider rings.  The kids loved walking across it.

 This was my favorite activity this year.  I did three jars, one with grapes for "Evil Eyes", one with bags of pudding for "Wounded Hearts", and one with spaghetti for "Scattered Brains."  I blindfolded the kids and had them reach their hands in and try to guess what they were.  It was great.  I got the jars at Walmart for $3.49, covered with felt, cut a hole in the top and tied with twine.

 My neighbor Alisa came up with this great "spider" craft.


 For this year's treat, we made Frankenstein cupcakes.
 My fun find was Wilton color spray.  It is like spray paint for cakes.  It was $1.79 at Walmart.

This was the take home treat for each kiddo.  Bugles make the perfect fingernails.  Thanks to my husband for asking the guy at Rubios for a dozen food handlers gloves.  Our party was a huge hit.  I hope this inspires you to host your own.  Check out the October issue of Parents magazine for more ideas.

Thursday, October 28, 2010

Craftastic News

I have fabulous news to share today.  Hobby Lobby is coming to American Fork!  They are taking the old Smith's location across the street from Chick-fil-A.  Woo Hoo!  If you haven't been to Hobby Lobby, they have everything from craft supplies, to fabric, to home decor items.  Their selection is SO much better than Roberts.  We are huge fans and can't wait to show you how far your dollar goes when shopping there. 

Wednesday, October 27, 2010

Cheap, Instant Artwork

If you are like me, you love a bargain.  A couple years back when looking for artwork for Porter's room, I came across old Mary Engelbreit calendars that I had.  I flipped through and thought the prints would make great art.  So, I matted and framed them.  The frames are the Ribba series from Ikea.  You can get 8x10 frames for $4.99.


I loved how these bigger ones turned out.  I used black scrapbook paper from Roberts, mounted the print on it, then mounted that on the mat provided with the frame from Ikea.  Isn't that just the best print? 
So if you are looking for artwork for your child's room, find a calendar you like, buy frames from Ikea, and you will have great inexpensive art.

Tuesday, October 26, 2010

Adding a Personal Touch to Your Child's Bedroom

 A couple of weeks ago, I helped my mother-in-law decorate a room for when her grandkids come to spend the night.  She has six grandkids, 3 boys and 3 girls.  In order to put a personal touch for each one of them, I came up with the idea to put their intial next to a picture of them on the wall.

I bought wooden letters at Roberts for $2.19 (They were 40% off).  Then I picked scrapbook paper that would coordinate with the bedding and decor of the room.  To adhere the paper, spray the wooden letter with spray adhesive and press firmly along the entire letter.

 Using a sharp utility knife, cut along the edges of the letter.  Make sure to cut on a cutting board.

 Put a light coating of Modge Podge on the top to seal it.

And here's the finished look.  I bought the frames at Ikea for $2.99.  You could easily spell out your child's full name on the wall with a variety of pics or use an 8x10 frame with a single initial.  It was a very inexpensive way to add a personal touch.

Monday, October 25, 2010

Preparing Your Yard for Winter

Today's fun find is FERTILIZER!  I know not so exciting.  However, if you apply IFA's Fall Blend today, you will be jumping for joy and ecstatic when your grass comes up green in the Spring.  Everyone always asks me how I get my yard to look this green in March and April. 
The answer is Fall Fertilizer.  I know it is raining outside, but head to IFA in American Fork (across the street from Chick-Fil-A), put on your rain slicker, and get some fertilizer down on your lawn.  Trust me, you'll thank me in the Spring. 

Friday, October 22, 2010

Feeding your gouls and goblins on Halloween

I've never tried dinner in a pumpkin before and I couldn't find a recipe that sounded too appealing to me.  If any of you have a delicious dinner in a pumpkin recipe let me know!  Instead I thought I'd share a homemade pizza recipe that I love.  While you may not have time to do homemade pizza the night of the big trick-or-treat, this might be something fun to do as a family the day before or after...

Pizza Crust Recipe (Better Homes and Gardens Cookbook pg. 147):
2 3/4 cups all-purpose flour
1 package active dry yeast
1 cup warm water
2 tablespoons cooking oil or olive oil

In large mixing bowl combine 1 1/4 cups flour, the yeast, and 1/4 tsp salt; add warm water and oil.  Beat with an electric mixer on low speed for 30 seconds, scraping bowl.  Beat on high speed 3 minutes.  Using a wooden spoon, stir in as much of the remaining flour as you can.

Turn dough out onto a lightly floured surface.  Knead in enough remaining flour to make a moderately stiff dough that is smooth and elastic.  Divide dough in half.  Cover; let rest for 10 minutes.


Grease pans (I used flat 10" pizza pans).  With greased fingers, pat dough onto bottoms and halfway up sides of prepared pans.  Cover and let rise in a warm place until nearly double (30-45 minutes).  Bake at 375 for 20-25 minutes...(I would recommend about 10 minutes...so its' not too crispy by the time you cook it with the toppings as well!)

BBQ Chicken Pizza
Three chicken breasts or 10-12 chicken tenders, cooked and cubed
1 cup hickory barbeque sauce
1 tablespoon honey
1 teaspoon molasses
1/3 cup brown sugar
1/2 bunch fresh cilantro, chopped
1 pizza crust
1-2 cups mozzarella cheese
Crumbled bacon

In a saucepan over medium heat, combine cooked chicken, bbq sauce, honey, molasses, brown sugar and cilantro.  Bring to a boil.

Spread chicken mixture evenly over pizza crust and top with bacon and cheese.  Bake for 15-20 minutes at 425.

Speaking of pizza, Pier 49 is giving free slices of pizza tomorrow, October 23rd from 12-5 p.m.  If you go to their site and vote for your favorite, the pizza with the highest votes is what will be served! 

For dessert, we have a tradition in my family to make caramel apples for Halloween.  So yummy!  Here's how we do it:

Pull the stem out of medium-sized granny smith apples (I use long-nosed pliers to get it it all out!)


I buy the wood dowels in the craft section of any store (got mine at Walmart) and cut them in half.  Some stores also sell caramel apple sticks with a pointed end to make it easier to insert into the apple.  Avoid popsicle sticks as they usually don't hold up while you are dipping the apple.


Now you're ready to make the caramel!  The easy version is to melt Kraft caramels, but here's a homemade caramel recipe that's yummy!

Caramel
 2 cups brown sugar
1 cup Karo
Mix and bring to a good boil over medium heat
Add...
1 square butter
1 can sweetened condensed milk
The recipe says to cook to about a soft ball stage...it may be best to boil for about 5 minutes and let the caramel thicken.  You want to avoid overcooking or the caramel will be really hard!

When caramel is ready, begin dipping apples.  I find the easiest way to do it is to place the whole bottom part of the apple in and spoon caramel around the top (stick) part.  Then hold the apple above the pot of caramel for about a minute to let excess drip off...about halfway through turn apple upside down (holding it like a sucker) to let the bottom part of the apple form.  I used wax paper to place them on but have heard parchment paper works better to avoid the apples sticking.


Now for the fun part!  We add all kinds of fun toppings.  My favorite is the apple pie caramel apple...white chocolate with cinnamon sugar!  So yummy!  A fun thing to do is let every family member make their favorite.  When they are all done, cut them up and let everyone try a bit of all of them!

Hope you enjoy a great Halloween dinner!

Thursday, October 21, 2010

A twist on candy corn and ornaments

Our friend Kallee brought us this cute idea from her sister Ashley.  I love that it's so unique! 


 Supplies:

Styrofoam wreath ($8 at Roberts, around $5 with 40 percent coupon)
Black duct tape
Two bags of candy corn
Hot glue gun
Ribbon

Wrap wreath completely with duct tape.  Hot glue candy corns in alternating directions (clockwise, then counterclockwise).  (It's easier to start in the middle and work your way out instead of starting on the edges...then you know the most noticeable rows are straight and even!)


Finish with ribbon and you've got a festive Halloween wreath!  Thanks so much for sharing Ashley!


My friend Stephanie made these darling Halloween ornaments with some friends in her neighborhood...I love them!

 Supplies:

White, silver and orange glass ball ornaments
Ribbon in different colors and textures (could include twine, raffia and tulle)
Variety of fabrics cut in 10X10 squares
Thin wire and cutters (Roberts sells thin floral wire that works well for this!)
*Most of the supplies shown in the pictures came from Jo-Ann's fabric

Wrap the ornament in the fabric (keeping the silver top on).  Tighten a piece of wire (6-7" long) around the bottom of the silver topper (tight enough so it won't slip off).  Trim the fabric above the wire to desired length (keeping some short and some long makes for a cute effect).  For the main piece of ribbon, you'll want a thicker, longer piece wrapped around first.  Then adorn with different ribbons, tulle etc.!


Tie a skinny ribbon through the silver topper and hang from door knobs, Halloween trees or your chandelier!  Thanks for sharing Steph!


 PS...I received the Tai Pan 50 percent off coupon in email format today...if you'd like me to forward it, please leave your email in a comment! 


Wednesday, October 20, 2010

Pottery Barn on a Budget

Lisa and I have flipped through the pages of Pottery Barn magazine for years admiring the beautifully laid out pages and hoping one day our homes would look just like it.  With disposable money it probably would...but we feel why spend the big bucks when it can look just as nice for much less!   

This is a picture of a table setting I really liked in their catalog...

Photo courtesy of Pottery Barn catalog
Leaf plate...$10, dipping bowls...$6, set of four white dinner plates...$48, twig charger...$16, place mats...$8, for a grand total of $88 (which you times by four at least to decorate your whole table!)

Here's my version of the fall dinner plate...

Leaf plate...$3 (Walmart), fall pick...$1 (Jo-Ann's), dinner plate (set of 18)...$15 (Ikea), white distressed charger...$3 (Tai Pan), place mat...$2 (Walmart), for a grand total of $24!

I must say IKEA is the place to go for so many different items, but this was a great find...$15!  And they  have this set in a variety of colors.

Last time Lisa and I were at Tai Pan we saw a beautiful spray tied to the back of a dining room chair.  Unfortunately each one was $20.  As we wandered through the store I found some cute picks for $3 each...and Lisa had the great idea to just use them to tie to my chairs!  I really like how they turned out.

My table is now set for a Thanksgiving feast...oh how yummy it will be!


I will say I still love to receive the Pottery Barn catalog in the mail and find much inspiration from its pages.  Occasionally I even splurge and purchase something I LOVE and know I won't find anywhere else.  You too can get a free catalog in the mail by visiting here.

Tuesday, October 19, 2010

Family.Artwork

Photography is an art and what better artwork to display in your home than your family!  Fall is a typical time for everyone to have new photos of their families.  Here are a few ways I've used our family photos to decorate...

 Occasionally you'll get a picture taken that you love...blow it up big!  Amanda Peterson (amandasimages.blogspot.com) took Chayce's newborn pictures and she did an amazing job with both of my boys.  Kenny's in Orem (44 West Center, kennysphoto.com) does a great job with printing and mounting.  This is a 20X24 mounted on foam board.  The frame doesn't have glass and was a great deal ($32 by Bluebird Frame Co., bluebirdframe.blogspot.com). 

I bought this wrought iron photo hanger from Rod Works a few years ago.  It's a great way to decorate a larger space on the wall.  They also have great ribbon for $1 a yard (for this look you need two yards of ribbon per picture...if you ever need advice on how to do this just email us!)  These photos of my boys were taken by Haley Warner (haywusup.blogspot.com), another one of my favorite photographers! 

 As you can tell, I really like the distressed, rustic look for frames.  These ones came from Tai Pan, but at different times.  I think the big one is my favorite frame.

This is a fun way to display pictures of your kids in their room.  These are the simple wood frames from Roberts painted black.  My neighbor Jamie does a great job with vinyl sayings (expressivethoughtsvinyl.com) and did his name and birthday for me (I used the tweed font).  Its fun to put pictures from different ages up to see how much they change!  
Find a place in your home to keep a picture of each child in their newborn stage...I'm reminded daily of what a blessing it is to have these little guys in my life!

I'm currently on the hunt for more rustic frames.  When we finish our basement I'm going to do a collage wall with 10-12 mismatched frames.  So far Tai Pan has been five for five in my search.  They always have really cool frames.

As an end-note, I found some great deals at Tai Pan yesterday with my 50 percent off coupon...so fun to get deals! 


Monday, October 18, 2010

Capturing the Perfect Moments

Every Fall, I look forward to taking a family picture.  One of my friends from high school takes the most amazing photos.  She took the kids' pics in May and just did our family pics.  Her name is Julie Oeser and her site is http://julieophotography.blogspot.com/.  She has an incredible eye and has wonderful locations to choose from.  If you are in need of a photographer, she's the one you want to call.  Here are a few of my favorites that she's taken.


On another note, start Christmas early by buying yourself a present.  Target has Singer sewing machines on sale for $69.  Click here Singer Sewing Machine to buy.  I am happy to have a sewing class for anyone interested.  Don't forget to look at yesterday's post (Sunday) for another fabulous find!

Sunday, October 17, 2010

The Halloween/Fall Decor Sale You've Been Waiting For

Now through October 30, TaiPan is having a 50% off your entire Fall/Halloween purchase.  The coupon came out today (Sunday) in the Deseret News newspaper.  It's a full-page ad on page A7.  I'm not sure if it's also in the Daily Herald.  Find a copy of the paper and head to TaiPan.  We were there on Friday and they still had TONS of great stuff.  (We have one extra coupon for the first person who needs it!)

Friday, October 15, 2010

Frosting from the store? Never Again!

I grew up with a mother who made everything from scratch, buttercream frosting included.  Once you have tasted homemade frosting, you CAN'T eat frosting from a can.  Here is the easiest, most delicious recipe for buttercream frosting. 


(Frosting will cover: 3 dozen cookies, 24 cupcakes, 2- 9inch rounds, 9x13)

Put 3/4 cube butter (room temperature) in a medium bowl
Add 1/3 bag powdered sugar and mix together
Add 1/4 cup cream or milk
Add the rest of the bag of powdered sugar and mix well
Secret Ingredient: 1 teaspoon Almond Extract
If the consistency is still not thick enough, add more powdered sugar.  If it is too thick, add a teaspoon more of cream or milk.  If it tastes too sugary, add 1 tbsp more of butter.  Once you have the consistency right, then add food coloring if necessary.  You cannot screw up this recipe.  It is very forgiving and absolutely delicious.  Just ask anyone who's eaten one of my cupcakes.  ENJOY!!

Thursday, October 14, 2010

Pillows, Pillows, Where Can I Find a Pillow?

 It took me six years to find pillows for the couches in my front room.  You're never going to believe where these finally came from: Walmart.  I know, you wouldn't think that Walmart could have such darling pillows.  Well, they do and for only $10-14 a pillow.  The two above are from their Better Homes and Gardens line.  I love the difference in texture and pattern and how they compliment each other.  They are absolutely my favorite.  Walmart in AF has a huge selection of pillows in every range of color.  Pillows are an inexpensive way to update any decor and transform the look of a room instantly.

 These two also came from Walmart.  I like that they are both quilted but in a differing pattern.  They compliment the pattern perfectly.  When purchasing pillows to accompany a pattern, make sure to take a swatch of fabric with you, so that you can match in the store.

 I found this Halloween pillow at TaiPan and it works great on this bench.

 Don't be afraid to mix shades of one color.  For example, the light green of the solid pillow works fine with the darker green and brown in the other. 

Ikea is also a great place for pillows as you buy the pillow case and insert separately.  The light green cover was $7 and the insert $6.  The tan pillow with the horizontal detailing adds a nice dimension without having to add pattern.  It came from Big Lots for $5.