Monday, January 31, 2011

It Makes the Room!

My fun find for the week is this chandelier from IKEA.

It is the perfect touch for any girl's room.  And for $39.99, it is a steal!!  It comes in black or silver and is super easy to install.  I had to have it for Khloe's room, and it makes her room!  It is by far my favorite piece in the room.  Stay tuned this week for other aspects of Khloe's room.  Whenever anyone comes through my house, it is their favorite room.

On another note, this month's winner of the $25 Gift Certificate to Real Deals is Heather Peck! Congratulations and happy shopping.

Friday, January 28, 2011

Delicious Dessert

This cake is quick, easy and delicious!  I've made it for a few events and it's always a hit! 

White Cake with Strawberries
1 white cake mix
8 ounce cream cheese
12 ounce container cool whip
1 cup white sugar
1-2 pound package of strawberries

Make cake as directed (I usually cook it on the minimum time recommended and check...it is much better when the cake is soft and fluffy!)
Blend softened cream cheese and add cool whip and white sugar.  Spread over cooled cake.
Top with cut strawberries and chill in the refridgerator until time to serve.


Thursday, January 27, 2011

Basement project 2...Framing

It's fun to see walls put up!  It makes the project feel real!  We hired Kevin Madsen (801-850-7839) to frame our basement and were very happy with his work.  He came when he said he would and listened and carried out on all of our requests.  I recommend him!

A few things to think through before framing...

*Exact dimensions on all rooms and walls
*Space for closets
*Shelving for storage rooms

Anywhere you want drywall to go has to be framed out.  I didn't know this, but all exterior cement walls have to be framed out as well.  I've learned alot about construction in this process! 

We decided to utelize as much space as possible for storage.  We made one large bedroom four feet smaller and created a small bathroom instead of ultra-large for another storage space.  Kevin framed out all three of our storage spaces which will help to keep us very organized! 

The city asked me to make sure our framer properly built the areas with "firestops".  I won't go into the explanation for what that is, but it's something you'll want your framer to know to pass code! 

We're making great progress!

Wednesday, January 26, 2011

The finished product

The second part of my refinishing project was much easier than the first...although with paint you have to be patient waiting for each coat to dry.  I'm one to like everything done in one sitting so it definitely helps me work on patience :) 

I used black furniture paint from Four Chairs Furniture in Lindon.  They give you a step-by-step instruction sheet on what to do to help you as well.  They say to use a foam brush (the .50 ones from Roberts) instead of a bristle brush or roller to get nice, even strokes. 


When I did my first test strip the paint was really runny and looked more like a stain.  I solicited Lisa's help more than once through this project as she's painted a few items of furniture, and she reminded me I needed to shake the paint!  After I'd done that it went on great!

This was halfway through my first layer.  You want to use long, even strokes so you don't end up with choppy lines throughout the furniture (again, thanks for the tip Lisa!). 

The paint dried pretty quick which was nice.  Four Chairs recommends a light sanding in between each layer of paint (with a 450-600 grit sand paper) to get rid of any rough spots.  My piece of furniture was quite smooth so I didn't worry as much about this step...I was also pretty careful to keep the paint smooth without any runs or globs left behind.  To completely cover the red it took three coats of paint...although I only did two in the parts that aren't quite as visible.

After the paint was completely dry, I applied two layers of top coat to seal the paint to prevent chipping.  I used a water based top coat that you apply with the foam brush (also bought at Four Chairs).  Unfortunatley I should have paid more attention to the temperature restrictions as my top coat turned out a little streaky.  Again, this is where more patience would have paid off!  So my finished piece isn't quite as smooth as it should be...but it's done :) 

 Tada...this is what it is now!

 I really love the addition of the knobs...gives it a fancy look!

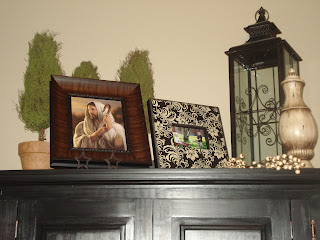
I rearranged and added a few decorations to the top of the armoire and really like how it turned out.   Changing the armoire from red to black has really changed the look and feel of the whole room and I really like the "new" piece of furniture!

I hope this has given you motivation and not discouragement in finishing a piece of furniture!  However, I'd recommend waiting until Spring so you don't have to slave away in your cold garage! 

Happy painting!

Tuesday, January 25, 2011

Out with the red, in with the black...

The armoire in my family room used to look like this...


When we bought it I was in love with the red...times have changed.  I've decided I'll never buy a large piece of furniture in anything but black, cream or natural wood.  Too much work to change :)  However, I am very pleased with the finished product and very glad it's what I want for the space. 

To get started, take every piece apart...knobs, hooks, screws...everything.  It's much easier to paint and can easily be put back together in the end.  Put your furniture in a space that can get dusty...sanding creates a nice layer of colored dust (in my case red) over everything in the room. 

Any refinishing project is SO much easier with an electric sander.  In my case the armoire would have been impossible to sand by hand.  Electric sanders really aren't too expensive (the one pictured is $20 at Home Depot) and they are so worth the money!  I went through about 10 sheets of 150 grit sandpaper for my project.  
Unless you plan to antique the furniture after painting, you really only have to sand the top layer of paint.  Once the shine is gone from the paint it usually means you're good.  You can always paint a test strip to make sure the paint will adhere to the wood.  If you do want to antique, you can also plan out the spots around the edges and make sure you sand down to the wood in those areas...you wouldn't necessarily need to strip the whole piece down to the natural wood. 

After sanding, use a damp cloth to wipe the entire piece down to remove all the dust.  Let dry and wipe with a dry cloth to get rid of any excess dust.  It took me about 6-8 hours to sand my armoire to give you an idea on time.  I will admit sanding is a royal pain and feels never ending at times.  There were multiple nights I came into the house looking like a tomato.  However, it can be done and as I said before, the results are all worth it!

Tomorrow I'll show you how I painted and finished the armoire! 

Monday, January 24, 2011

fun find: glass knobs

I found these little beauties at the Emporium at Thanksgiving Point...

...for $3.99 each!  That's a pretty good deal for fancy knobs!  They have a hint of black in the middle...just perfect to match the project I've been working on the past few weeks and can't wait to share with you tomorrow and Wednesday!  Stay tuned! 

Glass knobs can add character to any piece of furniture.  The Emporium had lots of different styles to choose from ranging from $3.99 to $14.99.  Our friend Kallee bought a big one from them and put it on the middle drawer of a green end table she has and it looks great! 

Friday, January 21, 2011

Homemade Chicken Noodle Soup

Here's the recipe for tonight's dinner and the best homemade chicken noodle soup.

In a 12" tall stock pot, boil a whole chicken.  Place the chicken in the pot and add water until chicken is covered (about 12 cups).  Add 2T of salt and 3/4 cup dried onion.  Bring to a boil and boil over med-high heat for 2 hours.  (Chicken legs will pull off when done.)  Remove chicken and skim onion and any "sludge" out of broth.  You can use a strainer.  Add 2 cups carrots, 2 cups celery, and 4-6 cups dried noodles to the boiling broth.  (I love the Country Pasta egg noodles sold at Costco.  They are just like the homemade ones my mom makes but without all the hastle.)  Cook for 30-40 mins until noodles and veggies are soft.  Shred chicken and add to pot.  Add salt and pepper to taste.  Serve and enjoy!
(This makes a ton of soup, so freeze your leftovers in a gallon Ziploc!)

Thursday, January 20, 2011

Changing up a space one pillow at a time!


So I was never really crazy about these throw pillows in my family room.  After Christmas, I headed to Hobby Lobby to look for some new fabric.

 I fell in love with this paisley print.  Using your pillow as a measurement guide, cut out your material.  Make sure to leave the fold so that you'll only have 3 sides to sew.

 Sew the edges on the wrong side of the fabric, leaving an opening to stuff the pillow in.

Fold right side out, stuff in pillow, and sew seam shut.

For $13 in fabric, I got two new pillows that I love.  If this DIY project has inspired any of you to learn to sew or become more efficient with your sewing machine, I would love to offer a class to any interested.  Please leave a comment, and I'll plan a class for all you new sewers.  If you've never sewed but want to learn, now is your chance!

Wednesday, January 19, 2011

Being More Organized in the New Year

Here are 3 of my favorite organizing tips for the New Year:

1.  The Christmas Fund:  Set up a separate savings account attached to your checking account at your bank. (I have three savings accounts: general, car insurance paid quarterly, and Christmas).  Each month at pay day, transfer an allotted amount.  By the end of the year, you'll have the money for Christmas and won't have to scramble or charge.

2.  Tax Folder:  Keep a folder labeled "Tax Documents" in your desk drawer.  As statements come in, put them in that folder.  Also, keep any medical bills, copay receipts, prescription receipts, etc as they are all deductible!


3.  Daily Triage:
Set up a wall-mounted file holder with the posted categories.  Sort your papers daily and recycle all that doesn't fit into the categories.  Counters are made to be kept clean.  Ikea sells a metal and white version for $9.99.

Tuesday, January 18, 2011

Customized Bulletin Board

 I wanted a customized bulletin board in my kitchen to help with all the clutter of mail and reminders, so I headed to Hobby Lobby and Roberts for this DIY project.

 I bought the ready made frame at Hobby Lobby for 50% off, so it was $20 for a 22x28 size.  I got a piece of cardboard from Costco for free and cut it to size. 

 Next, I duct taped the rolled cork board to the cardboard.  Roberts sells the roll of cork board for $7.49, but with the 40% off, it was $4.49.  After securing the cork, I laid it on top of the wrong side of the fabric and secured with a regular stapler.
 Again, the fabric came from Hobby Lobby and was $10 for 1 yd (which is a great price for 54" wide decorator fabric.)

 Next, I took Grosgrain Ribbon ($1.99 a 15yd bolt at Hobby Lobby) and secured it in a crisscross pattern using thumbtacks.

 I used Push Points from Lowes ($1.29) to secure the board into the frame.

You simply use a flat head screwdriver to push the push points into the frame, continuing all along the back of the frame.

Then I placed two self-leveling picture hangers (again from Lowes) at the top.

I love it because not only is it a bulletin board, but the fabric makes it look like art!

Monday, January 17, 2011

My Favorite Flowers

Tulips are my favorite flowers.  In the doldrums of January and February, the sight of them on my counter reminds me that Spring is just around the corner.  The fact that Costco sells a dozen for $8.99 makes me giggle with delight and is my fun find for the day!  To make the arrangement above, pick out a small square or rectangle glass vase.  Ikea sells a small rectangle one for $3.99.

 Cut transparent scotch tape into skinny strips long enough to stretch from side to side.  Create a crisscross pattern of four by four rows.
 Cut the stems of the tulips, so the bud is just above the height of the vase.  Then place the tulips in the grid pattern, one in each square.
And voila: A little bit of Spring to brighten your day.  Tie a ribbon around the top to hide the tape!  You didn't know you could be a florist!

Friday, January 14, 2011

Panera Broccoli Cheese Soup

My friend Brooke made this soup for me awhile back and it is SO good.  We don't have a Panera in Utah County, but I believe its alot like Paradise Bakery.  At least we can make their yummy broccoli cheese soup at home! 

I love to use this bag of broccoli from Costco.  It's only about $5 and lasts for awhile.  All you need to do to use it is defrost in cold water in a ziplock for about 20 minutes before you use it.


Panera Broccoli Cheese Soup
1 tablespoon butter, melted
1/2 medium onion, chopped (I use dried onion)
1/4 cup melted butter
1/4 cup flour
2 cups half and half
2 cups chicken stock or chicken broth
1/2 pound broccoli
1 cup carrots
1/4 teaspoon nutmeg
salt and pepper
8 ounces cheddar cheese

Saute onion in butter, set aside
Cook melted butter and flour using whisk for 3-5 minutes.  Slowly add half and half.  Add chicken broth whisking continuously.  Simmer for 20 minutes.

Add broccoli, carrots and onions and cook until veggies are tender, 20-25 minutes.

Pour into blender and puree (or keep it chunky...my husband likes it better like that!)

Return to pot, add cheese and heat until melted.

Enjoy!


Thursday, January 13, 2011

Building permit...

If you are finishing a space, its smart to get a permit from the city, and required beyond finishing so much square feet (I'm sorry I don't have the exact number for you...)  We received our permit from the city and our floor plan now looks like this:

They give you all the specifications you need to meet to pass building codes.  If you don't have a general contractor, this is very important information to follow because if the jobs aren't done to code, the sub contractors have to go back and redo them...and you are the one that has to account to the city.

Our permit cost about $500 and cost will vary depending on the size of your space and what will be built into the space.  This includes four inspections...

After framing, electric, heating and plumbing
After insulation
After sheetrock
Final inspection

Our framing starts tomorrow so a post about that will be coming soon!

**I will share a final finished cost of our basement at the end so you can see what you might expect to pay for yours!

Wednesday, January 12, 2011

Basement Job #1...Heating

Framing and heating are the first two jobs to tackle when finishing a basement.  One framer who came suggested we get the heating done first in case there were any extra "runs" that needed to be framed around.  So we had our heating done first.

***The biggest savings when sub-contracting the jobs out yourself is when you receive multiple bids from different contractors.  This will make sure you receive the lowest price possible.  We are getting three bids for each job which gives a pretty good range and options to choose from. 

We decided to go with Holmes Heating and Air in Lehi (801-768-4151).  They had the lowest price and have already been to our house to do most of their work. 

The size of your basement will determine whether or not  you will need a seperate heating unit.  Ours is about 1200 square feet and we are able to use one furnace to heat the whole house.


Each room has a heat "run" which moves the air to that particular space.  Usually bedrooms have at least one run and larger rooms such as a family room have two.  They also install a "return" which takes the cold air out to filter the warmer air in.  Typically the heating professionals will also install the vent for your bathroom.  "Registers", or the plates that go over your finished vents, should come in the price of your bid.

Our basement needed a total of six runs, one return and a bathroom vent.  How nice it will be to have a nice, warm, cozy basement!  

Tuesday, January 11, 2011

Finishing the basement

Our house runneth over with toys and items that need to be placed neatly on shelves...so we are finishing the basement!  I can't tell you how excited I am...


We've decided to contract the jobs out ourselves to find the best prices.  If you don't have access or time to do this, general contractors are the way to go.  But if you are in the market to finish your basement and would like to hire it out yourself, I'll show you the steps to take to do it!  There will be a post for each job that needs to be done to help you decide the best options!

To get started, you'll want to draw out a floor plan of how you'd like your basement finished. 


Here's a checklist of the main jobs that need to be contracted out in order of when they need to be done...

1.  Framing
2.  Heating/Air ducts
3.  Electrical work
4.  Plumbing

***Near the beginning of the project you'll want to get a building permit from your city.  After the plumbing is done they will come in and inspect along with a few other times throughout the building process.

5.  Insulation
6.  Drywall, mud and tape (texturing the walls)
7.  Painting
8.  Carpeting/flooring
9.  Finish work (moldings, shelving in closets, cabinets etc. - some of this could and should be done before flooring)

...and not to forget the best part...decorating the space!  I'm so excited to share the info I'm learning about this process to give you the opportunity to do it too!

Monday, January 10, 2011

Fun find: Demask Design

I found these picture frames at Taipan last week...

I love the demask print...especially in black because you can put it with any other type of decor and it works!  The large frame was $30, but they have a 20 percent off single item coupon right now at the registers.  The small one was $13. 

Friday, January 7, 2011

The Perfect Chicken Pot Pie

My favorite winter meal hands-down is homemade chicken pot pie.  So, today I share the recipe with you.  It takes about 1 hr from start to finish.  To begin, boil 2 pieces of chicken breast in water.  (Get your pot boiling, cut chicken in 1"x2" pieces and boil for 20 mins)  Boil cubed veggies, ie potatoes, carrots, celery, peas, whatever you like, til cooked (about 20 mins).  Now on to the chicken gravy.  Place 3tbsp butter in sauce pan with 3 ckn bouillon cubes, can of chicken broth, and 1 cup water.  Bring to boil.  In Pyrex measuring cup or small bowl, add 1/3 c flour to 1 c warm water and whisk.  Add to boiling broth mixture and whisk over medium heat.  Stir til thick and then add salt and pepper to taste.  Turn to low and cover with lid. 

 As you can see, I have all my pots going at the same time to maximize time management.

 For the perfect pie crust, mix 2 c flour and 1 tsp salt in medium bowl.  With a pastry blender, cut in 1 cup shortening until crumbly.  Add 1/4 c ice cold water and stir with fork until dough holds together.  Form into two balls.  Roll out on plastic wrap to make transferring to pie plate simple!  It is my favorite pie dough trick.

 Once you've placed your bottom crust, peel off the plastic wrap, cut off the excess from the edges and poke holes with fork along the bottom and sides.

 Add veggies and shredded chicken.

 Add gravy.
 Add top, cut off excess, pinch edges and cut four vent holes in the center.  Bake at 425 degrees for 30-35 mins or until golden brown.
Let stand for 5 mins, cut into pieces and top with extra gravy.  It is so comforting and the best winter meal.  Enjoy!