Showing posts with label Halloween. Show all posts

Friday, October 14, 2011

Mummy Cupcakes

I am looking for treats for my annual Halloween party.  I love these cupcakes from BHG.com.


To make the cupcake, follow these steps:
1. Use a pastry bag with a basket-weave tip to pipe on white frosting.
2. Pipe on red frosting for the mummy's eyes.
3. Make two dots using black frosting for the pupils.

Thursday, October 13, 2011

Halloween Pillow

Lindsay and I saw this pillow at Material Girls in South Jordan.  I loved it and had to make one for myself.  Using fabric from Broadbents, I set out to create my own.

I pinned black tulle that I sewed a seam and then pulled to gather and orange ball fringe to my spider fabric.  Pin towards the middle of the fabric, so that when you sew right sides together, the fringe will show.


I printed the numbers on my computer, backed the bat fabric with stiff iron-on interfacing, and then cut out the numbers.


I then sewed the numbers on to the spider fabric, sewed right sides together, stuffed the pillow with batting, and added the twisted fabric circles and ribbon.

I made my pillow for about $10 and love how it turned out.  Look for inspiration everywhere and then create your own version!  I love knowing that I made that!

Wednesday, October 12, 2011

Halloween Banner


A couple of weeks back, I went to Broadbents in Lehi and found this fun fabric for a Halloween banner for Super Saturday.  It was super easy to make per Lindsay's directions here.

Here it is as part of my Halloween decor.  If you want one, I still have some kits left.  They are $5.  Leave me a comment if you are interested.

Tuesday, October 11, 2011

Halloween Sparkle

I needed a little more sparkle for my mantel, so I ran into Scrooge and Marley's and found these great sparkle orange pics.  They also had one in orange and black.  I bought both!

It added just that extra "umph" that I needed.

Monday, October 10, 2011

Halloween Ribbon


Rod Works is a great place to find ribbon by the yard for a great price.  I was putting out my Halloween decor last week and needed some coordinating ribbon for my topiaries.  I bought this polka dot in orange and purple for $1 yard.  I love my topiaries and didn't want to take them down, so I added the ribbon and loved the outcome.  It is a simple thing that took them from day to day to Halloween decor.

Friday, October 29, 2010

Hosting Your Own Spooktacular Halloween Party

 Every year, I host a little party for my kids and their friends.  Halloween with toddlers is a ball.  I am the token witch.  We start off with "witches brew", rootbeer and dry ice. 

 The pinata is always the last activity and the most fun.  If you've never done a pinata, go to Partyland and get one.  Porter had to have Dracula.  Thankfully, they had one.

 Walmart and Target have great cheap decorations for all of your needs.

 Black plastic sheeting from Lowes, rope, a ladder, and black garbage bags made the perfect tunnel for our little spooks to come through to enter the party.

 I found a bunch of old barn wood to make the signs.

 The spider balance beam was a great addition this year.  I bought cement blocks from Lowes (1.39 ea) and a 2x6x8.  I found great spiders at TaiPan for around $3 and used a bunch of black spider rings.  The kids loved walking across it.

 This was my favorite activity this year.  I did three jars, one with grapes for "Evil Eyes", one with bags of pudding for "Wounded Hearts", and one with spaghetti for "Scattered Brains."  I blindfolded the kids and had them reach their hands in and try to guess what they were.  It was great.  I got the jars at Walmart for $3.49, covered with felt, cut a hole in the top and tied with twine.

 My neighbor Alisa came up with this great "spider" craft.


 For this year's treat, we made Frankenstein cupcakes.
 My fun find was Wilton color spray.  It is like spray paint for cakes.  It was $1.79 at Walmart.

This was the take home treat for each kiddo.  Bugles make the perfect fingernails.  Thanks to my husband for asking the guy at Rubios for a dozen food handlers gloves.  Our party was a huge hit.  I hope this inspires you to host your own.  Check out the October issue of Parents magazine for more ideas.

Friday, October 22, 2010

Feeding your gouls and goblins on Halloween

I've never tried dinner in a pumpkin before and I couldn't find a recipe that sounded too appealing to me.  If any of you have a delicious dinner in a pumpkin recipe let me know!  Instead I thought I'd share a homemade pizza recipe that I love.  While you may not have time to do homemade pizza the night of the big trick-or-treat, this might be something fun to do as a family the day before or after...

Pizza Crust Recipe (Better Homes and Gardens Cookbook pg. 147):
2 3/4 cups all-purpose flour
1 package active dry yeast
1 cup warm water
2 tablespoons cooking oil or olive oil

In large mixing bowl combine 1 1/4 cups flour, the yeast, and 1/4 tsp salt; add warm water and oil.  Beat with an electric mixer on low speed for 30 seconds, scraping bowl.  Beat on high speed 3 minutes.  Using a wooden spoon, stir in as much of the remaining flour as you can.

Turn dough out onto a lightly floured surface.  Knead in enough remaining flour to make a moderately stiff dough that is smooth and elastic.  Divide dough in half.  Cover; let rest for 10 minutes.


Grease pans (I used flat 10" pizza pans).  With greased fingers, pat dough onto bottoms and halfway up sides of prepared pans.  Cover and let rise in a warm place until nearly double (30-45 minutes).  Bake at 375 for 20-25 minutes...(I would recommend about 10 minutes...so its' not too crispy by the time you cook it with the toppings as well!)

BBQ Chicken Pizza
Three chicken breasts or 10-12 chicken tenders, cooked and cubed
1 cup hickory barbeque sauce
1 tablespoon honey
1 teaspoon molasses
1/3 cup brown sugar
1/2 bunch fresh cilantro, chopped
1 pizza crust
1-2 cups mozzarella cheese
Crumbled bacon

In a saucepan over medium heat, combine cooked chicken, bbq sauce, honey, molasses, brown sugar and cilantro.  Bring to a boil.

Spread chicken mixture evenly over pizza crust and top with bacon and cheese.  Bake for 15-20 minutes at 425.

Speaking of pizza, Pier 49 is giving free slices of pizza tomorrow, October 23rd from 12-5 p.m.  If you go to their site and vote for your favorite, the pizza with the highest votes is what will be served! 

For dessert, we have a tradition in my family to make caramel apples for Halloween.  So yummy!  Here's how we do it:

Pull the stem out of medium-sized granny smith apples (I use long-nosed pliers to get it it all out!)


I buy the wood dowels in the craft section of any store (got mine at Walmart) and cut them in half.  Some stores also sell caramel apple sticks with a pointed end to make it easier to insert into the apple.  Avoid popsicle sticks as they usually don't hold up while you are dipping the apple.


Now you're ready to make the caramel!  The easy version is to melt Kraft caramels, but here's a homemade caramel recipe that's yummy!

Caramel
 2 cups brown sugar
1 cup Karo
Mix and bring to a good boil over medium heat
Add...
1 square butter
1 can sweetened condensed milk
The recipe says to cook to about a soft ball stage...it may be best to boil for about 5 minutes and let the caramel thicken.  You want to avoid overcooking or the caramel will be really hard!

When caramel is ready, begin dipping apples.  I find the easiest way to do it is to place the whole bottom part of the apple in and spoon caramel around the top (stick) part.  Then hold the apple above the pot of caramel for about a minute to let excess drip off...about halfway through turn apple upside down (holding it like a sucker) to let the bottom part of the apple form.  I used wax paper to place them on but have heard parchment paper works better to avoid the apples sticking.


Now for the fun part!  We add all kinds of fun toppings.  My favorite is the apple pie caramel apple...white chocolate with cinnamon sugar!  So yummy!  A fun thing to do is let every family member make their favorite.  When they are all done, cut them up and let everyone try a bit of all of them!

Hope you enjoy a great Halloween dinner!

Thursday, October 21, 2010

A twist on candy corn and ornaments

Our friend Kallee brought us this cute idea from her sister Ashley.  I love that it's so unique! 


 Supplies:

Styrofoam wreath ($8 at Roberts, around $5 with 40 percent coupon)
Black duct tape
Two bags of candy corn
Hot glue gun
Ribbon

Wrap wreath completely with duct tape.  Hot glue candy corns in alternating directions (clockwise, then counterclockwise).  (It's easier to start in the middle and work your way out instead of starting on the edges...then you know the most noticeable rows are straight and even!)


Finish with ribbon and you've got a festive Halloween wreath!  Thanks so much for sharing Ashley!


My friend Stephanie made these darling Halloween ornaments with some friends in her neighborhood...I love them!

 Supplies:

White, silver and orange glass ball ornaments
Ribbon in different colors and textures (could include twine, raffia and tulle)
Variety of fabrics cut in 10X10 squares
Thin wire and cutters (Roberts sells thin floral wire that works well for this!)
*Most of the supplies shown in the pictures came from Jo-Ann's fabric

Wrap the ornament in the fabric (keeping the silver top on).  Tighten a piece of wire (6-7" long) around the bottom of the silver topper (tight enough so it won't slip off).  Trim the fabric above the wire to desired length (keeping some short and some long makes for a cute effect).  For the main piece of ribbon, you'll want a thicker, longer piece wrapped around first.  Then adorn with different ribbons, tulle etc.!


Tie a skinny ribbon through the silver topper and hang from door knobs, Halloween trees or your chandelier!  Thanks for sharing Steph!


 PS...I received the Tai Pan 50 percent off coupon in email format today...if you'd like me to forward it, please leave your email in a comment! 


Sunday, October 17, 2010

The Halloween/Fall Decor Sale You've Been Waiting For

Now through October 30, TaiPan is having a 50% off your entire Fall/Halloween purchase.  The coupon came out today (Sunday) in the Deseret News newspaper.  It's a full-page ad on page A7.  I'm not sure if it's also in the Daily Herald.  Find a copy of the paper and head to TaiPan.  We were there on Friday and they still had TONS of great stuff.  (We have one extra coupon for the first person who needs it!)

Wednesday, October 13, 2010

A Signature Item

 As Lindsay and I find things worth spending a little extra on, we will highlight the item as a signature piece.  This black tree is one of those items.  I fell in love with it when I had a jewelry party as the jewelry girl hung her necklaces on it.  Well this year, I found it at TaiPan for $49.97.  I was able to use a 25% off coupon, so it was only about $37.  It stands about three feet high and looks great on top of my toy chest in the family room.  It reflects in the mirror which makes an interesting effect. I chose to decorate it for Halloween using all items purchased again from TaiPan.

 My favorite pieces to add were a spider garland and pieces from a berry and candy corn sprig.  I unwrapped the pieces of the sprig and then entwined the separate pieces around the tree.

 Then I simply added Halloween ornaments and some ribbon.

I realize the picture is a bit fuzzy, but I love how the berry sprig looks throughout the tree.  This tree could be used year-round in your home as a table decoration or in the corner.  I absolutely loved how mine turned out and hope it inspires you to look for something different as a signature item!

Tuesday, October 12, 2010

The Power of Three

 I love grouping objects in threes.  Not only in threes, but in varying heights and sizes.  Take this grouping for example.  I love how the two pumpkins are similar but vary in height and size.  The witch is the perfect to fit between the two and add a different size and dimension.  When looking for objects to group together for any vignette, put them together at the store.  I find a space on the floor and start arranging.  That way I know before I leave the store if I like it.  All three of these came from Rod Works.  (Here's a little secret: The Rod Works in Draper is hardly ever busy and has a great selection.  It's located at
12200 South 726 East
(Dillman Square)
801-816-1272
Here's another example of a group of three.  I like this one as the pumpkin and sign tie together nicely.  I threw in the little sign to hide the sign holder and found that even though it's very small, it works with the set. 

 This grouping is actually five, but again the odd number of objects looks better on the table.

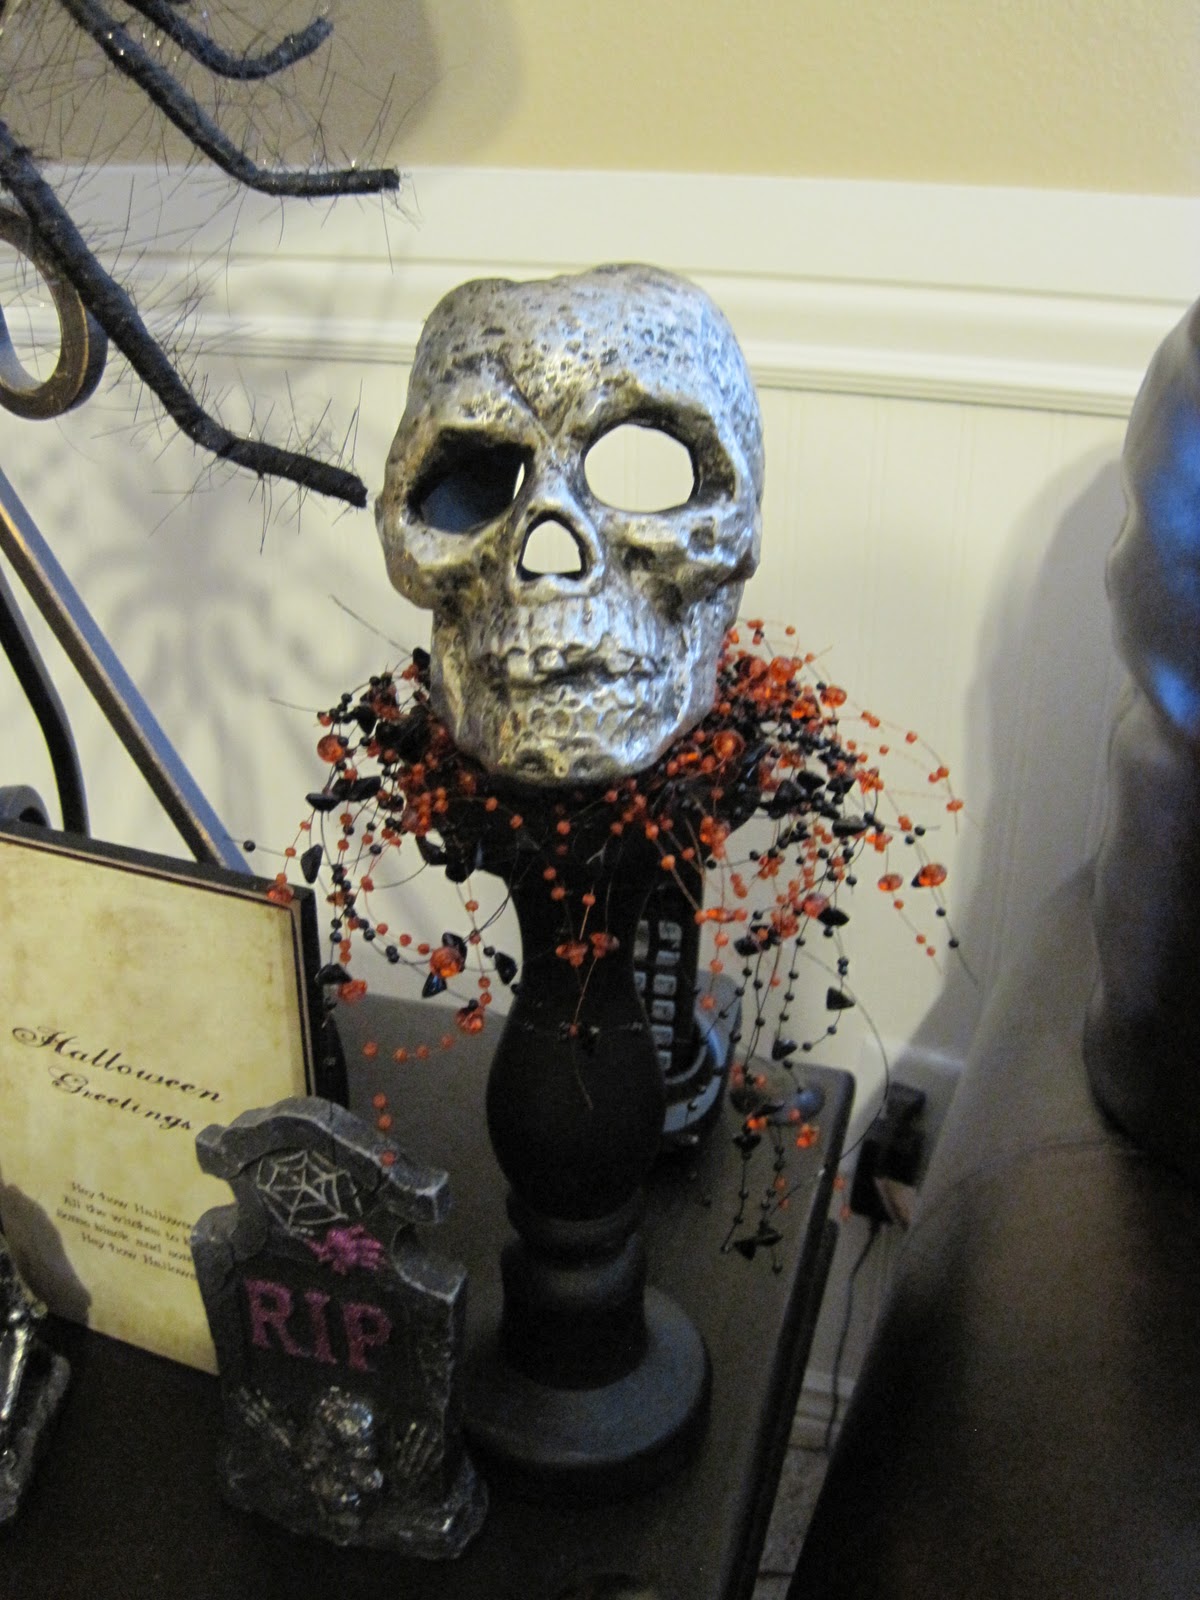
I also like to use a traditional object, like this candle stick, in a non-traditional way.  Instead of placing a candle on top, I placed the skull on top of the glass bead garland.  I got all three from Rod Works; the skull is made of metal and was only $4.95. 

Monday, October 11, 2010

Fun Find Monday

My fun find for Monday comes from Scrooge and Marley's.  I found these darling spiderweb doilies there and they make the perfect centerpiece for my Halloween plates.  I got the package of four for $5.  This month's gift certificate drawing is for a $25 Gift Card to Scrooge and Marley's (100 East State Rd in Lehi.) Remember if you are a follower or bring someone new and leave their name in a comment, you'll be entered into our drawing.

 Here's the centerpiece for my Halloween table.  At TaiPan, I got the "Boo" sign for 3.97, the bead garland for 3.97, the sparkly leave sprig, and small berry garland for $4. The tin pot was one I had in the closet.  I just spray painted it black.  I simply deconstructed the sprigs to make an arrangement in the pot.
 Rod Works has darling Halloween ribbon for $1 a yard.  I simply wove it through the light fixture and attached the bat.

 I added one of the black sparkly leaf sprig behind the berries to make it look more Halloween. 

My favorite way to decorate for holidays is to set the table for the holiday.  I did my entire table, plates and placemats included for under $20.   The plates and skeleton ornaments came from TaiPan.  The placemats from Target for $2.50.  Now I am ready to host a Halloween dinner.

Friday, October 8, 2010

Pumpkin Pops


 My friend Adrienne made cupcake pops as a thank you for a baby gift awhile back....she got the idea from bakerella.blogspot.com (such a fun site!)  They were DARLING and I had to try making them myself.  Although a bit time consuming, they are unique and delicious!  A twist for Halloween are pumpkin pops!  Here's the directions...

Items you'll need:
Cake mix
Cream cheese frosting
Orange and chocolate candy wafers (Roberts)
Green M&M's
Treat bags and lollipop sticks (Roberts and Walmart)
Flower foam or styrofoam

  •   Make cake as directed and let cool completely
  • Crumble cake into fine consistency and mix with cream cheese frosting (the back of a spoon helps to blend it well)
  • Roll mix into 1-1.5 inch balls (for the pumpkins I did more of an oval shape...what I thought looked like a pumpkin!) and place on cookie sheet covered with wax paper.  Stick in the freezer for about 15 minutes to harden


  •  The cupcakes turned out great with the orange top and were a bit easier than the pumpkins...to shape them, you need a small flower shaped cookie cutter...I use the round shaped Wilton Crinkle Shapes Fondant Cut-Outs (sold at Roberts...comes in a four pack).  Take the rounded balls out of the freezer and squeeze the bottom half of the ball into the tool.  Shape the top to form a cupcake.  Once formed, place back on cookie sheet right side up and place back into freezer for about 10 minutes.
  • Heat chocolate (can be heated in the microwave according to package instructions)
  • For pumpkins, place stick into the bottom (sometimes it helps to put a little bit of chocolate on the tip of the stick first).  Dip pumpkin in the chocolate top first and drizzle chocolate around the cupcake.  Turn right side up and place M&M on the top while the chocolate is still soft.  
  • Place in flower foam to dry.
  • Once dry, wrap in treat bags and tie with bow!  They make for a fun table display at parties as well!
  The cupcake pops take a little bit longer to dip...
  • Melt the brown chocolate and dip the bottom part of the cupcake.  While chocolate is still soft, place lollipop stick into the bottom.  Place upside down on wax paper for chocolate to dry.  
  • Once dry, dip top part of the cupcake in orange chocolate.  Hold right side up and let chocolate form around cupcake.  Place M&M on top while chocolate is soft. 
If you want to avoid lollipop sticks you can just dip them and place in small truffle boxes (they sell them at Roberts).  They would make a great teacher thank you or party favor! 

Again, bakerella.blogspot.com deserves the credit for these...she's come out with a book called Cake Pops which looks awesome!