Showing posts with label DIY Projects. Show all posts

Monday, April 16, 2012

Another Use


I had to share some pictures of other uses for the cute tags I posted about last week.  I found some different ribbon to add from The Emporium.  I love how this one turned out.


Adding it to my wreaths added just a splash of color and whimsy!  I loved the script ribbon I found at The Emporium.


I created this one for a bird cage in Khloe's room.  I LOVE it! 


I moved the birdcage from another spot on the shelf to the center because I love how the tag brought it to life.  This is such an easy project to make yourself.  I'll help anyone:)

Thursday, April 5, 2012

Happy Pinning


I love Pinterest and found a cute idea for a board here.  I wanted a place in my office where I could pin fabric swatches, magazine pages, design ideas, etc.  This was the perfect project.  I bought a package of cork tiles from Hobby Lobby.  They were $9.99, but I used my 40% off coupon.  Then I bought a piece of foam backed board to attach them to.  To begin, I taped off my design.  I would have liked it better if I would have taped the center of the middle square.  Then I painted the exposed cork.  Since I didn't love the center painted, I simply flipped the tiles around to make a chevron design.


Here's the finished product.  I hot glued picture hangers to the back to attach to the wall.  I love it and the inspiration it gives me when I swivel around in my desk chair!

Tuesday, April 3, 2012

A Little Bling


So I saw this in the Thanksgiving Point mailer yesterday and fell in love with it.  Armed with the picture, I headed to Hobby Lobby to get materials to recreate it!


The flower was on clearance for $2.  I paired it with a $.37 paper mache egg.  I bought two different colors of burlap (1/3 yard for $1.33).  I layered the greenish burlap in a mound gluing the layers.  Then I did layers of book pages and glued on the flower and egg. 


Then I glued two layers of grosgrain ribbon bows on the cream burlap and tied a piece of jute around it.  On the back, I put a little bundle of sticks ($4 for the large bundle from Hobby Lobby) and tied it with the jute.


The jeweled letter B was on clearance for $2.  I stuck it in the middle and glued it on the back to the burlap.  Then I simply tied the whole thing with the jute to the bird cage.  I love it.  It was super easy and was inexpensive.  TaiPan has cheap birdcages right now.

I love how it took my birdcage from boring to "blingtastic!"

Wednesday, March 28, 2012

A Wall of Plates

As part of the kitchen update, I wanted to decorate with a wall of plates.  I found a great selection.  I got most of the plates for $3 or less.  I found 6 of them at Target! This is such an easy project.


I bought hangers at Lowes and glued them on the back of the plates with hot glue.

This plate was my favorite, so I built the collection around it, hanging one at a time.


I love how it looks and the uniqueness of it!!  

Wednesday, March 21, 2012

Jumping off Point


Fabric is my favorite jumping off point in decorating a room.  These curtains were the inspiration for the makeover of my kitchen.  I found them at Pier One.  I bought one and cut it in half, sewing the edge to make my two panels.  I simply wanted it to accent the room, not for light control, so I only needed one panel.  It was the best $23 spent.  I got the rod at Hobby Lobby for $9 with my 40% off coupon.  Love Hobby Lobby!


I needed to update the bench and pillows for the new color scheme.  I found the striped fabric for $12, and the fabric for the two pillows was $15.  I loved the bright blue of the damask print and the quirky whimsy of the bird print.  I am so glad my mom taught me to sew.  It is so great to create my own projects with the help of my sewing machine.  Seriously, I will help anyone learn to sew!


I found a great new way to make pillows without having the exposed seam.  Simply cut the front panel to the size of your pillow.  Cut two back panels that overlap by about four inches lengthwise.  Turn over and sew a seam on one of the raw edges of both panels.  Putting right sides together, sew the four sides of the pillow, overlapping the sewn seams.  Flip right side out, inset pillow, and voila, no seam showing.  Don't know why it took me so long to figure this one out, but now I've got it mastered!  It is amazing what inspiration can come from fabric and how great a room can look with a variety of fabrics!

Tuesday, February 7, 2012

Book Pages Day 2


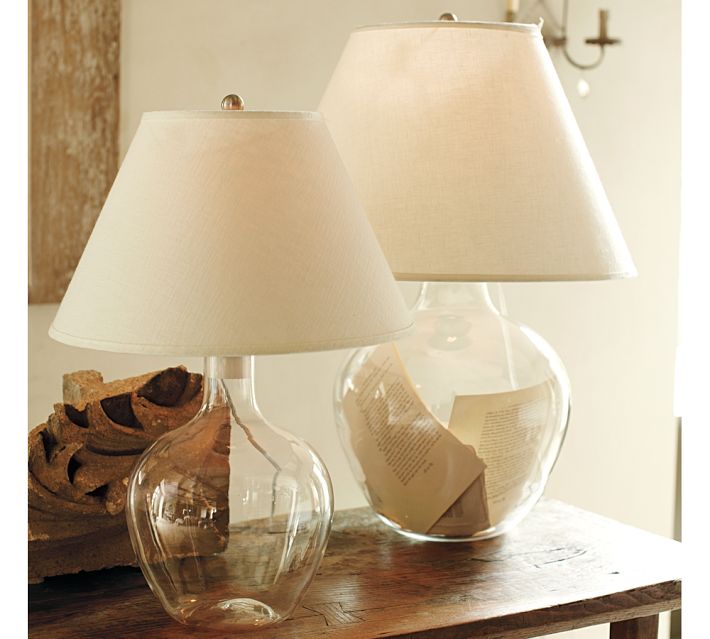
I loved this idea from Pottery Barn to add book pages into a clear jar, or the bottom of this glass lamp base.  Hobby Lobby has a great selection of glass jars as does Forget Me Not.  This would be a great addition to an office or your boy's room.  You can roll up the page and tie it with jute and then fill the jar, like a message in a bottle.

Monday, February 6, 2012

Fun Projects with Book Pages

All this week, I want to show you creative projects using old book pages.


The first is this wreath from Kallee's house.


To make it, just roll up the pages gluing them to a felt circle.  Continue until you've made a complete circle of pages.  Add whatever you like to the top of the felt and add to your favorite wreath. 

Monday, January 16, 2012

Fun with Old Books: A Valentine Banner


I saw on a blog a cute idea to use old book pages to make a Valentine banner.  Here is my spin on it.  I bought an old book from Forget Me Not for $5, some paper and letter stickers from Country Loft, and went to work with my glue gun.  I trimmed the pages to be 4 1/2".


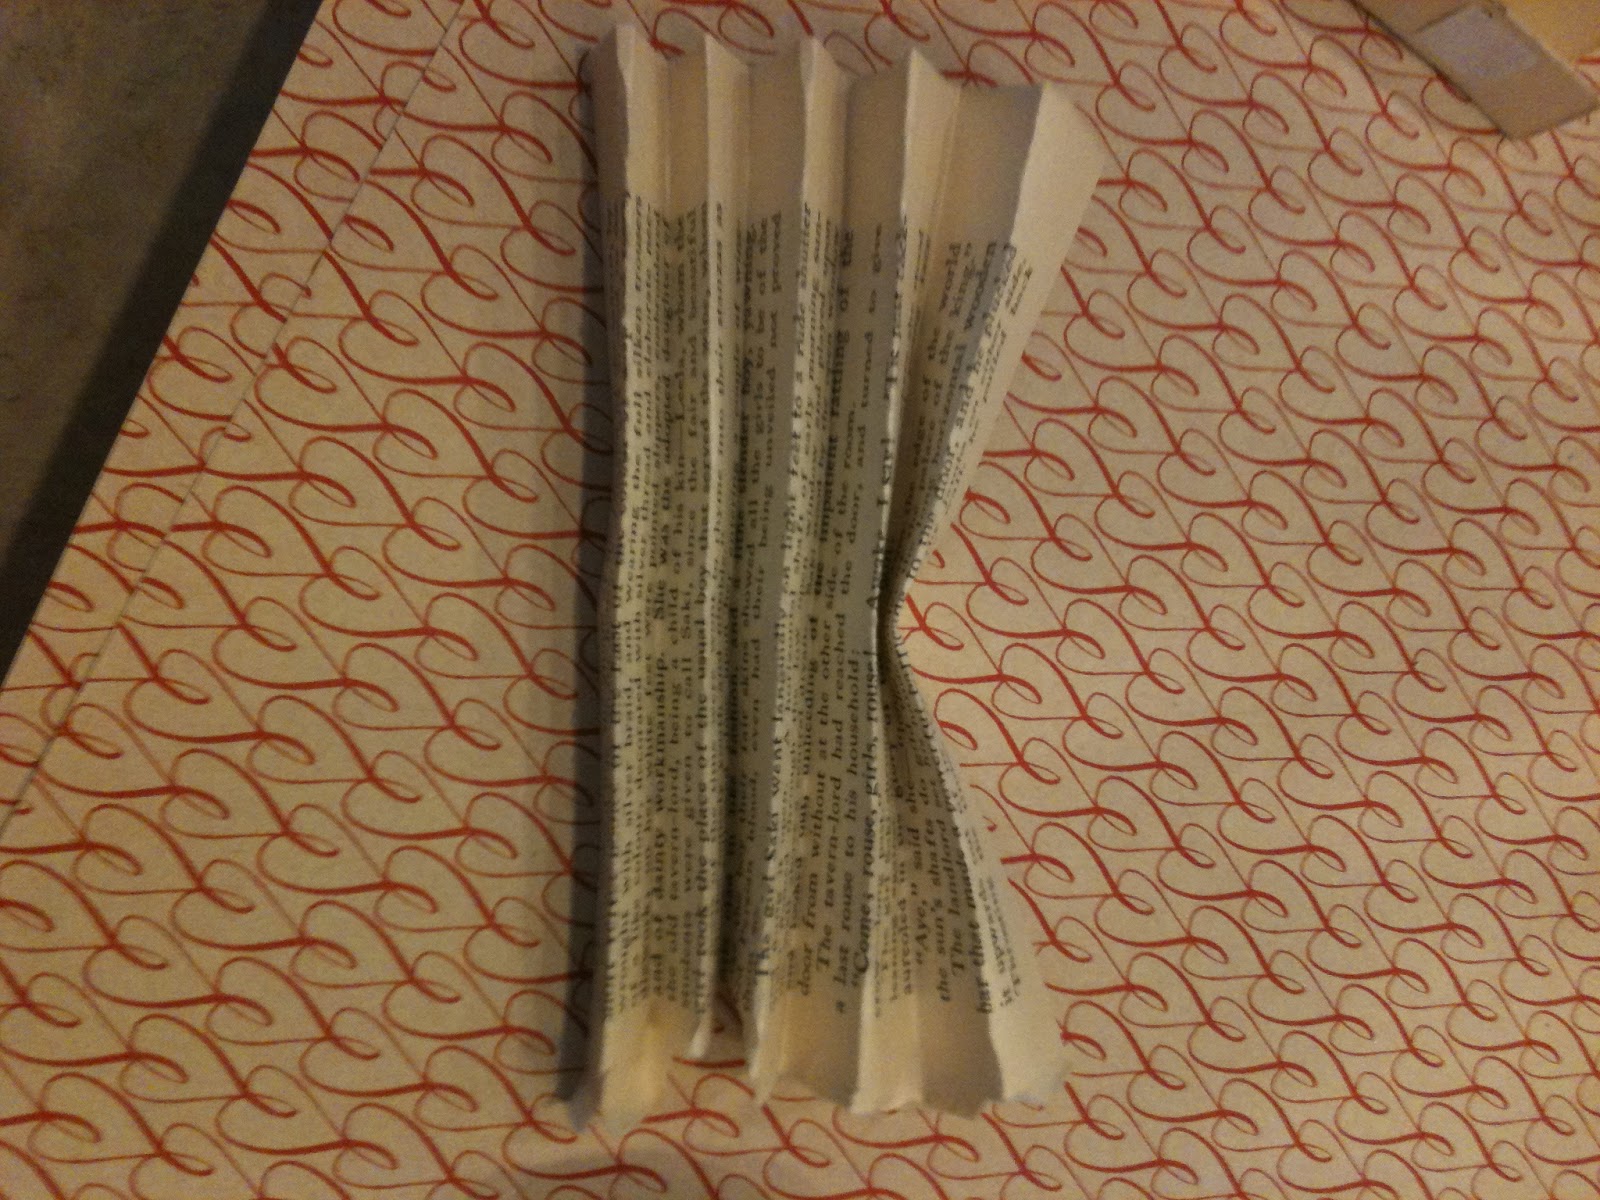
Accordion fold the pages and glue two together to make one long piece. 


 Fold in half and glue the edges of 1/2 circle together.


Repeat on opposite side and then glue to your paper.


Adorn with letter stickers.


I couldn't decide between two papers, so I made two different ones.


I don't know why this posted this way, but I love how it turned out.  I have two extra: one with the red letters, and one with the gold.  Leave a comment if you would like to be entered in the drawing to receive one.  I'll announce the winners tomorrow!  Happy DIY project day!

Tuesday, November 22, 2011

Jackie's House-Day One


My friend Jackie has champagne taste and makes it on a Diet Coke budget!  Let's start with this drum pendant lamp.  She found this shade at DownEast and made it work with an old pendant lamp.


Don't you want to sit and relax here?


This table lamp was black, so she just painted it to fit her room. 


Love this simple grouping on her mantel.  Groups of 3 always work.


Love her minimalist design aesthetic.


Love her picture wall with the letter "c" for her last name.


So here is the best find in Jackie's house.  If you've been looking for a sunburst mirror, you've noticed they can be pretty pricey.  Jackie made her own using bamboo skewers, a $5 circle mirror and a round wooden disc from Hobby Lobby.  The mirror is one that you put candles on, so it was super cheap.  She sharpened the ends of the skewers, glued them to the back of the disc, sprayed it all pewter and glued on the mirror.  Amazing $10 project.  Thanks for the inspiration Jackie!

Thursday, November 10, 2011

The Perfect Namesake Gift


My dear friend Amanda is having a baby boy and naming him Mason.  Tonight is her shower so to add a personalized touch to the pennant banner, I added his name in coordinating fabric.  I backed each one with stiff interfacing and attached it with Stitch Witchery.  No sewing required.


These Ball jars have "Mason" printed on the bottom and filled with marbles add a perfect whimsical touch to his bedroom decor.  Look for namesake items as they make the perfect gift!  I got the marbles at Walmart for $1 and the jar at Hobby Lobby for $.99.

Tuesday, November 8, 2011

A Twist on Family History

 I've wanted to create a family history photo tree for some time now.  I've been searching for just the right tree, frames, etc.  Well a few weeks back, I found it all.  I got the tree from Rod Works, the frames from Hobby Lobby, and copied the pictures at Costco using the wallet size option. 

 I collected pictures of our wedding, Davy's parents and grandparents, my parents, and grandparents.  I copied each in black and white and love how it turned out.

This is my Grandma and Grandpa Reedie's wedding picture.  I want my kids to be able to see who our ancestors are and love the vintage look of the old wedding pictures.


I spray glued Damask scrapbook paper to the back of each one.  It was a simple project that connects our families.

Tuesday, October 25, 2011

Simple Skirts


Want to make your own skirt for the girls in your life?  Just last week, I did a sewing class for my friend and her neighbors.  Each brought her own fabric and sewing machine and left with a finished skirt.  For $10 a person, I'll do the same for you, your neighbors, and friends.  Comment if you are interested!


To begin, cut your material 18" tall by 42" wide.  This skirt will fit a 3T to 4T.  (Increase or decrease length and width for your child.)  Sew a 1/4" seam on top and bottom of fabric.


Cut a strip of contrasting fabric 3" wide and 41" long.  Pin it on your fabric tucking a 1/4" seam along top and bottom.  Sew to fabric.  Sew 1/4" seams on back seams.  Fold top seam down 1 1/4" and pin along top.  Sew seam to create pocket for your elastic.  Sew back seams shut, stopping at pocket for elastic.


Thread your elastic and pull to correct size for child's waist.  Sew elastic together and then sew elastic pocket shut.


Fold right side out and your skirt is finished.  I added a flower and just stitched it on by hand.  This skirt really is easy to make.  Again, I am happy to hold a sewing class for those interested and walk you step by step through the process.

Thursday, September 29, 2011

Minky Blankets

With Lindsay having a girl, it gave me the perfect chance to make her a darling minky blanket with fabric from The Quilting Cottage.  If you haven't been there, you must go.  It is by the AF Tabernacle and has the cutest fabric.  Hobby Lobby has a great selection of minky as well as Broadbents in Lehi.

To begin, buy 1 1/4 yards of flannel and 1 1/3 yards of minky.  (The minky comes in a wider width).  You want your minky to be about 3-4 inches wider all the way around than the flannel.  Lay the minky on the ground right side down.  Lay flannel on top, right side up, centering on the minky.  Make sure you have 3-4 inches extra minky all the way around.  Trim if necessary.


Starting in the middle of one side, fold over minky, tucking in raw edge and pin.  Hem should be about 2 to 2 1/2 inches.  Continue around blanket.


At corner, pin tuck to make a 45 degree angle.  Pin entire blanket.  Machine sew along the inside 1/4 inch of the minky hem and sew up the 45 degree line to secure the blanket.


Pick some image on the flannel that repeats and stitch it like shown with the bunny.  This will keep the blanket together when washing.  Repeat for each image.


Here is the finished project.  I love how it turned out, and it was a great surprise for Lindsay.  It really is easy to sew for yourself.  Don't be afraid and email me with any questions!


You can use your extra material to make a mini version for a cuddle blanket!