Tuesday, April 19, 2011

Frame collage

Now that the basement is done it's time to decorate!  There's nothing better than a room with blank walls!  I've been collecting these frames for a few months and found the few final pieces to finish it off and hang it up! 

To do a frame collage, start by arranging everything on the ground first.  The great thing about a collage is you can put frames as close together or as far apart as you'd like.  And precise measuring is not necessary!  It's suppose to take on its own character and style...


One measurement that is needed is the center point of the wall.  For my design I moved the center picture up a few inches from the exact middle so my boys can't easily reach the bottom pictures of the collage.  Eventually I'm also going to put a long skinny table under the pictures and I wanted space to put decor on top of the table.  Make sure to take the full design of the wall into consideration before hanging!  It does create lots of little holes! 


Here are a few pictures showing the progression of the collage...


Notice the incorporation of the cute signs from yesterday :)

Here were my latest frame purchases...I love them both!

 
 $10.99 at Rod works (I also bought this in a 5x7 for the wall).  Such a great price for an ornate frame!


Roberts now carries a line of larger frames that are better for design than their previous selections...and with the 40 or 50 percent off coupon they are great prices!  This one was $20 and comes as a 12x12 opening with a mat.  I decided to print a 16x20 photo and cut it to 16x16 to display the photo without a mat.  They also had great chunky wood frames...I had a hard time deciding!

This is such a fun way to keep older photos displayed as well as candid shots taken from your own little camera! 

Monday, April 18, 2011

Fun find...vintage signs

Found these at Rod Works this weekend and love them...


I'll be posting about my photo frame collage this week that I originally talked about here.  These signs are part of it.  Stay tuned!

Friday, April 15, 2011

The Proof is in the Pudding

This is simply the best chocolate cake recipe.  It is so moist, you don't need frosting.  However, a butter cream glaze makes it to die for!


Cake:


  1. Preheat oven to 350°F. Grease and flour 10-inch Bundt pan or tube pan.
  2. Combine cake mix, pudding mix, eggs, water and oil in a large bowl. Beat at medium speed with electric mixer for 2 minutes. Pour into pan.
  3. Bake at 350°F for 50 to 60 minutes or until toothpick inserted in center comes out clean. Cool in pan 25 minutes. Invert onto heat resistant serving plate. Cool completely.
  4. For glaze, make butter cream frosting recipe found here. Microwave on high power 10 to 15 seconds. Stir until smooth. Drizzle over cake.


Thursday, April 14, 2011

Outside Lighting

One of our favorite followers, Jodi, updated her outside house lights with this beauty found at Lowes.  Jodi paid a sale price of $30 for each light!


It makes such a difference from the standard builder lights.  Thanks for the great inspiration Jodi.  Because of you, I re-did the lights at my house.  Here's a step by step tutorial for how you can change your lights as well.  Yes ladies, I did it by myself.  You can too. 
Step 1: Turn off the breaker for your outside lights.  Your breaker box is in your utility room in the basement.
Step 2:  Remove the wing nuts on the front of the light and remove light from bracket.
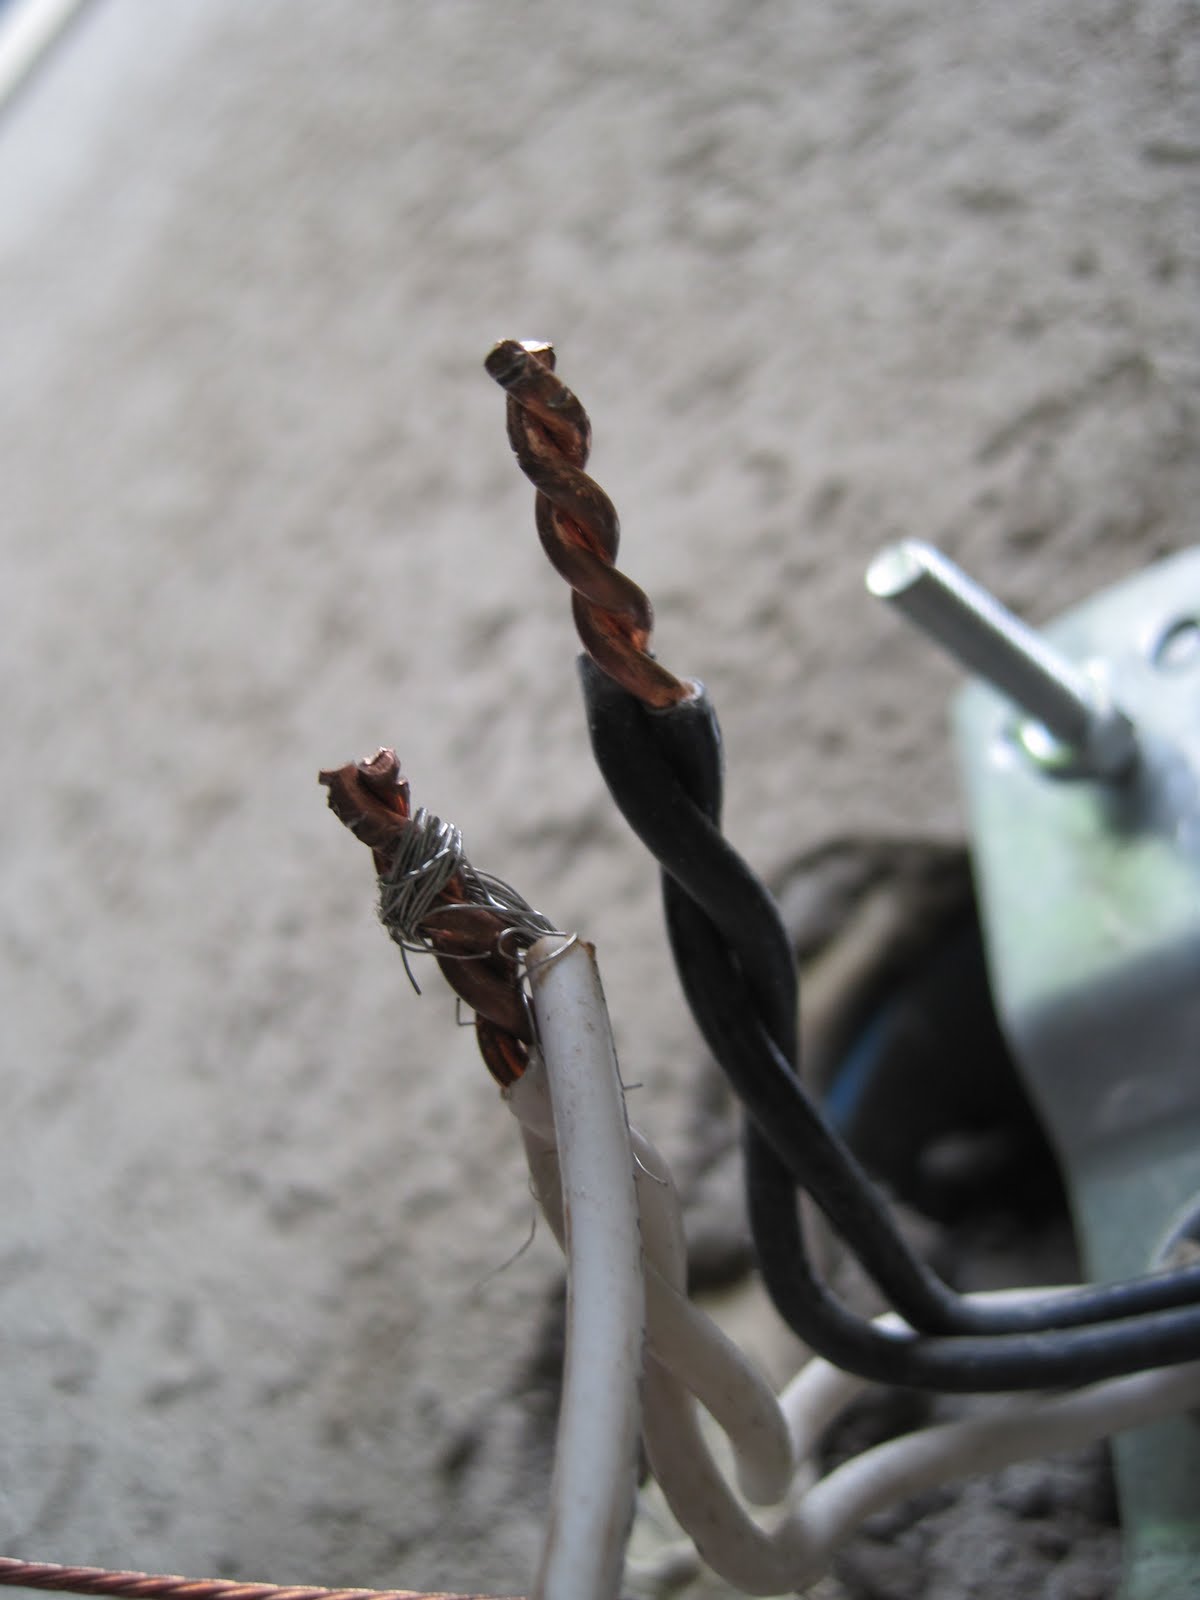
 Step 3:  Disconnect the wires, ground wire, and remove old bracket plate.
Step 4: Attach new bracket plate.
Step 5: Attach copper wire from light to copper wire coming out of socket and wrap around green bolt labeled "gnd".

Step 6: Attach white wires to white wires wrapping exposed end around wire from socket.  Cap with eletrical cap.  Twist cap until tight.
Step 7:  Repeat with black wires.

Step 8:  Screw wing nuts on to front of light until snug.  Will need to use an adjustable wrench to get them tight.
Step 9:  Insert light bulb.
Step 10:  Restore power by turning on breaker.

I love how these look.  I purchased them at Lowes for $23 each. 


$70 was money well spent to enhance my home with new lighting.  This really is an easy update for anyone to do.  Simply, follow the steps above and trust that you can do it!

Wednesday, April 13, 2011

New Carpet, New Bedding

Last week, we re-carpeted our home.  We used Wholesale Flooring in Lindon (the same used by Lindsay) and were so pleased with the results.  We chose a memory foam pad, and thick, luscious $25/yd carpet.  It only cost $3600 to do our whole house.  As we went with a darker carpet, it was time for a lift in the master bedroom.
I found this bedding at Target for $109.  It was a king comforter with two shams.  I wanted it to tie in with the headboard and existing pillows, and I love the result.

The carpet is heaven!  I love that they tucked the carpet under each stair to make it look more polished.  I would recommend them to anyone in need of carpet!

Tuesday, April 12, 2011

This n That

I have one of the most talented friends.  We featured her home a few weeks back, and now we are featuring her craft blog.  She gives tips on how to make the darling headband, skirt, and bracelet pictured below, as well as a little bit of everything else.  Check out Jamie's craft blog at http://alittlecrafting.blogspot.com/.  You will be amazed at all she can do, as well as what you can do by following her instructions.  Thanks Jamie for all of your "craftasticness!"


Monday, April 11, 2011

Hobby Lobby Shopping

As the Hobby Lobby in American Fork is now open and serving us all, I thought I'd share a coupon for 40% off one item.  I just bought new accessories for a makeover for Porter's room.  Check back in two weeks for the unveiling!  Both he and I are super excited!  Happy shopping!